DL8 Dragons of War: The Megadungeon Experience (Part 2)
January 17, 2024
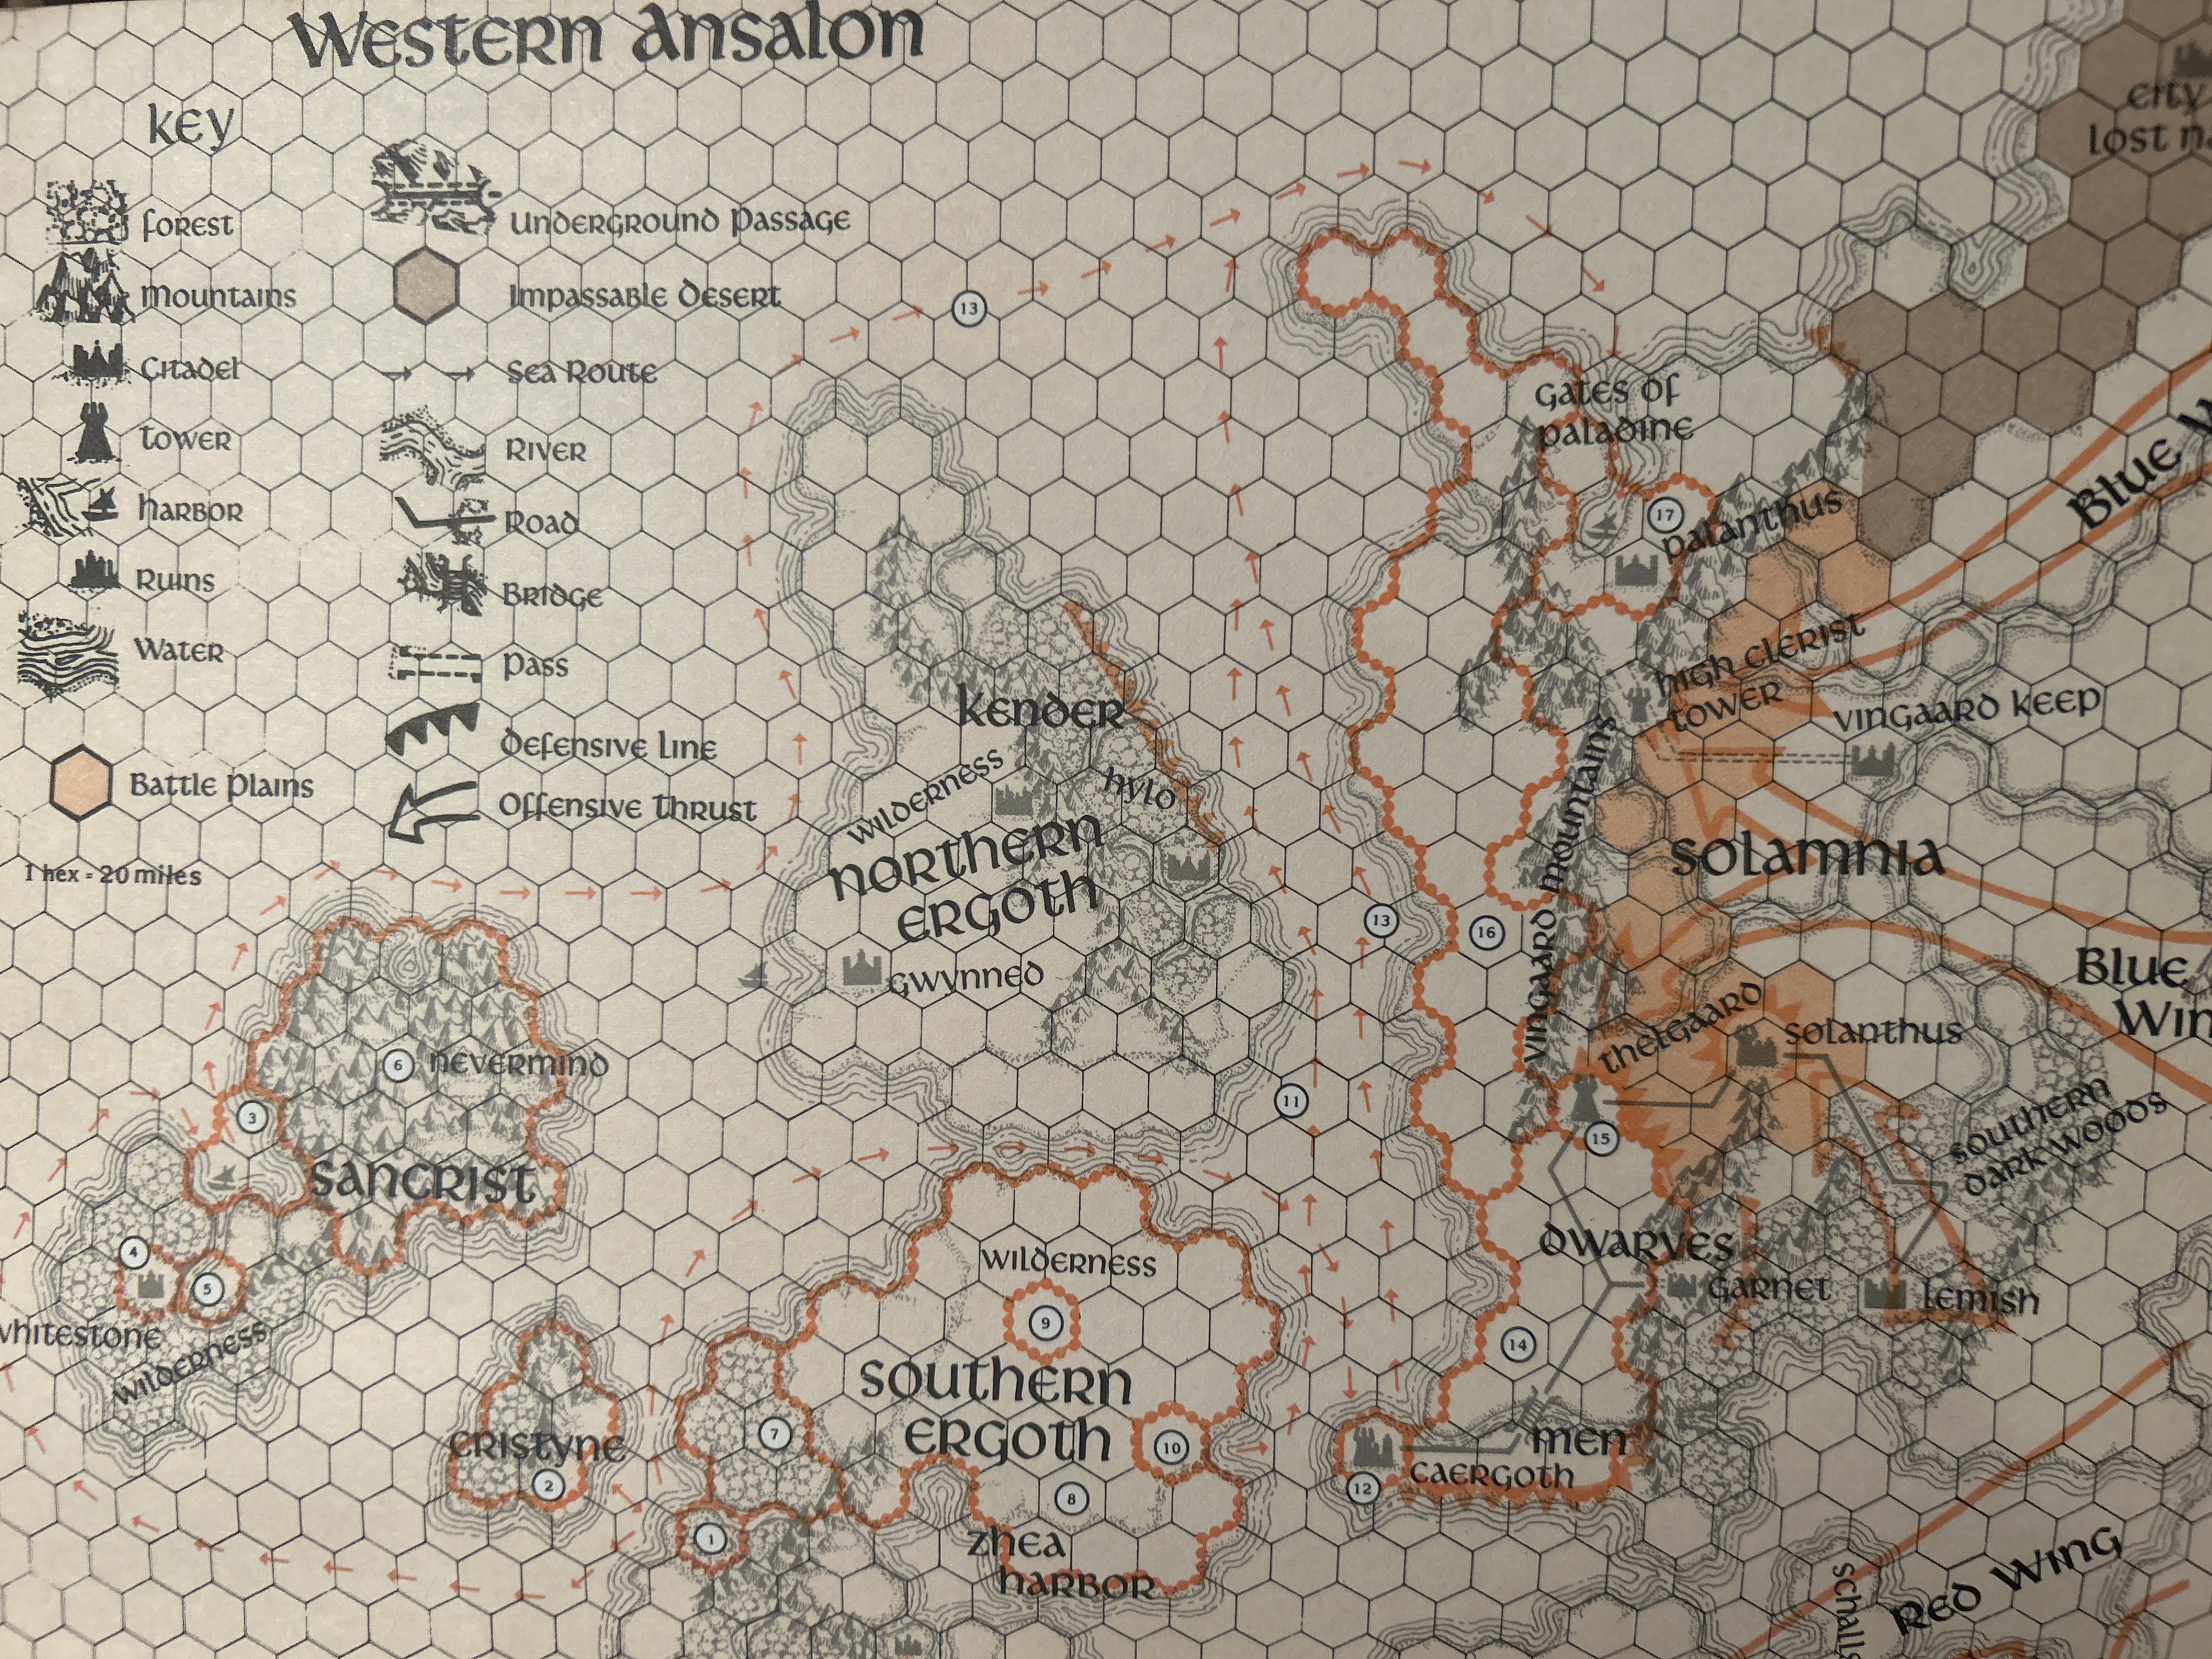
In part 1, I looked at how I prepared to run DL8 Dragons of War, focusing on the complex structure of the castle and the compelling treasures within. Here in part 2, I recount our actual play and call out the best and worst parts. Did my prep work bear fruit?
We played the module over three sessions…
Session 1
Whereas I6 Ravenloft has 8 pages describing the realm around the castle and fortune-telling to determine the goal artifacts and locations, DL8 has 8 pages of choose-your-path entries to accomplish the same.
Whatever. It’s long-winded but works okay for its purpose. Most Dragonlance modules only pretend to give freedom of choice in the journey to the primary adventure site, so at least DL8 doesn’t pretend. Or the entire thing can be skipped, and the DM states: “You arrive at the castle after X days and these are the goal artifacts and their rumored locations.”
In our game, the journey determined that the goal artifacts were the Crown of Yarus and the Codex Orbum. The pieces of the crown were in the High Clerist’s personal chamber and the Altar of the Orb. The Codex was at The Nest…the pinnacle of the castle tower.
The PCs arrived at the castle and had opportunity to learn rumors and lore by mingling with the mercenaries and refugees camped outside. Then they met the Solamnic Knights preparing to defend the castle against the approaching dragon army. The knights described the situation and status of the garrison. Yada yada yada. The important thing was for the PCs to learn about the major routes into the castle interior, as described in part 1.
The PCs choose to take the gallery stairs, as it sounded like the best bet for getting high into the tower as fast as possible. Quickly up they went, and we ended the session when they reached the Hall of Mirrors on level 5. The results of this session would guide my prep for the next, big session.
Session 2
To facilitate consistent pace in this session, we used both regular dungeon exploration and sparse exploration pacing. In practice, this involves the players declaring their general direction, mode, and goal of exploration. The DM then describes the route and destination, as well as any interruptions or discoveries along the way.
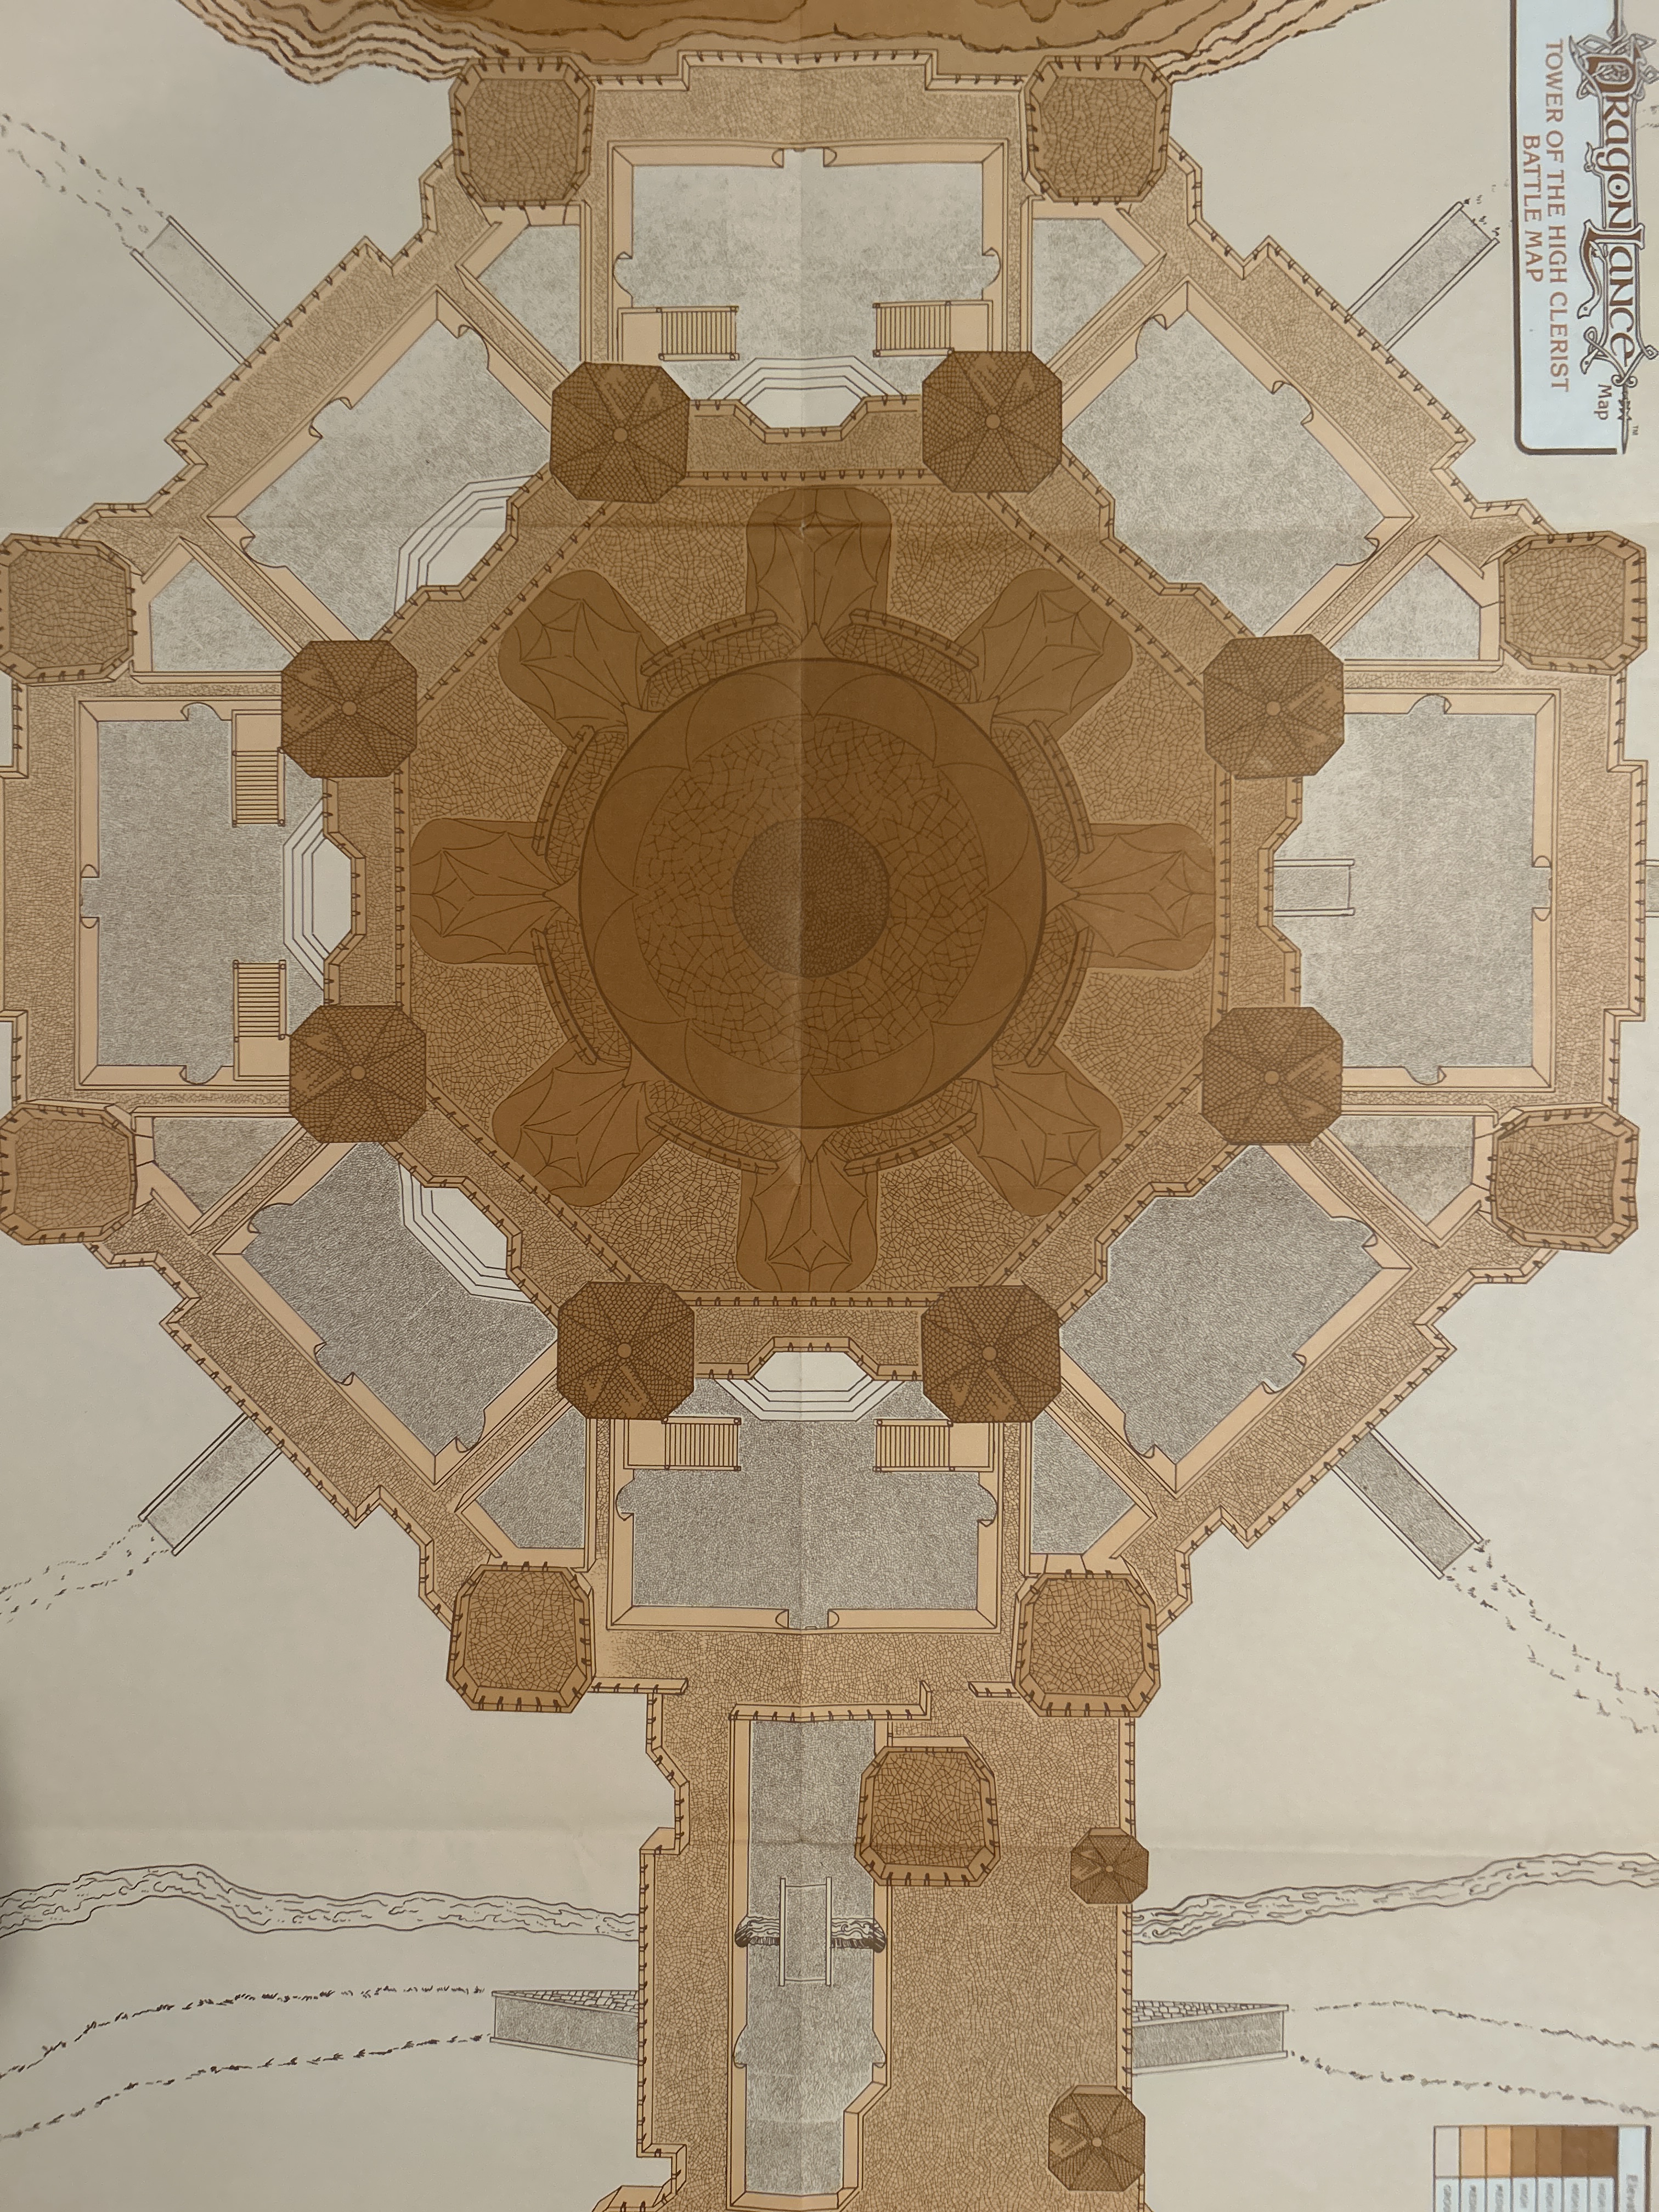
This technique worked well for areas where I had cut some of the more repetitive encounters (“sparse areas”), and we flowed freely back to regular dungeon exploration procedure when it seemed appropriate. No precision mapping was done, but some parts were sketched out on a large blackboard as the party moved through. Also, the party’s location in (x,y,z) space was casually tracked on the top down view of the castle:
Level 5: Tasslehoff, being a kender and kender being curious, couldn’t resist looking into the mirrors. This awakened the Fetch, a wraith-like creature visible only in the mirror’s reflection. This is a fun encounter if one can stomach the possibility of level-draining. The module doesn’t mention it, but I think the PCs could break the mirrors, a la Conan the Destroyer, to defeat the Fetch and potentially open a shortcut to the Eternal Halls. In our game, the mirrors were not broken and Tasslehoff was drained of multiple levels before the party escaped upstairs.
Level 6: Through the garden terrace and into a massive portcullis chamber where the PCs observed spectral men and women in elegant revelry. They seemed oblivious to the party’s presence and so the PCs mingled through and up the grand staircase.
Level 7: The stairs opened up onto a balcony overlooking the ballroom revelry. Some of the spectral dancers below took notice of the PCs, which prompted the party to duck into a nearby dining room of notable opulence. A Solamnic Lockbox was there. Tasslehoff picked the lock and found a tome within: The Tales of Virkhus. They read about the High Clerist’s powerful ally and then proceeded into a great hall of tapestries, statues, and a spiral stair going up. They briefly investigated another gallery of statues before a banshee chased them away and up the spiral stair.
Level 8: The party had the option to continue up the stairs or stop to explore this level. They were about to continue up, but a Will-o-wisp shimmered and beckoned down the hall. The PCs obliged and eventually found their way to a large cathedral where the Book of Habbakuk shined on the altar. The spectral caretaker of the abbey completed a prayer, then greeted the party. He was sympathetic to their quest and he shared what he knew about the Crown of Yarus and Codex Orbum. The caretaker gave them a special key to open doors and lockboxes throughout the castle. He also revealed to them a special lockbox upon the altar. Within: three pale green prism Ioun stones.
More spectral minions, of the philosopher and evil searcher varieties, were encountered while exploring the abbey, then the PCs made their way back to the spiral stairs and up.
Levels 9 and 10: Skipped because they are exact copies of level 8. Boo. Your mileage may vary. Up up up to…
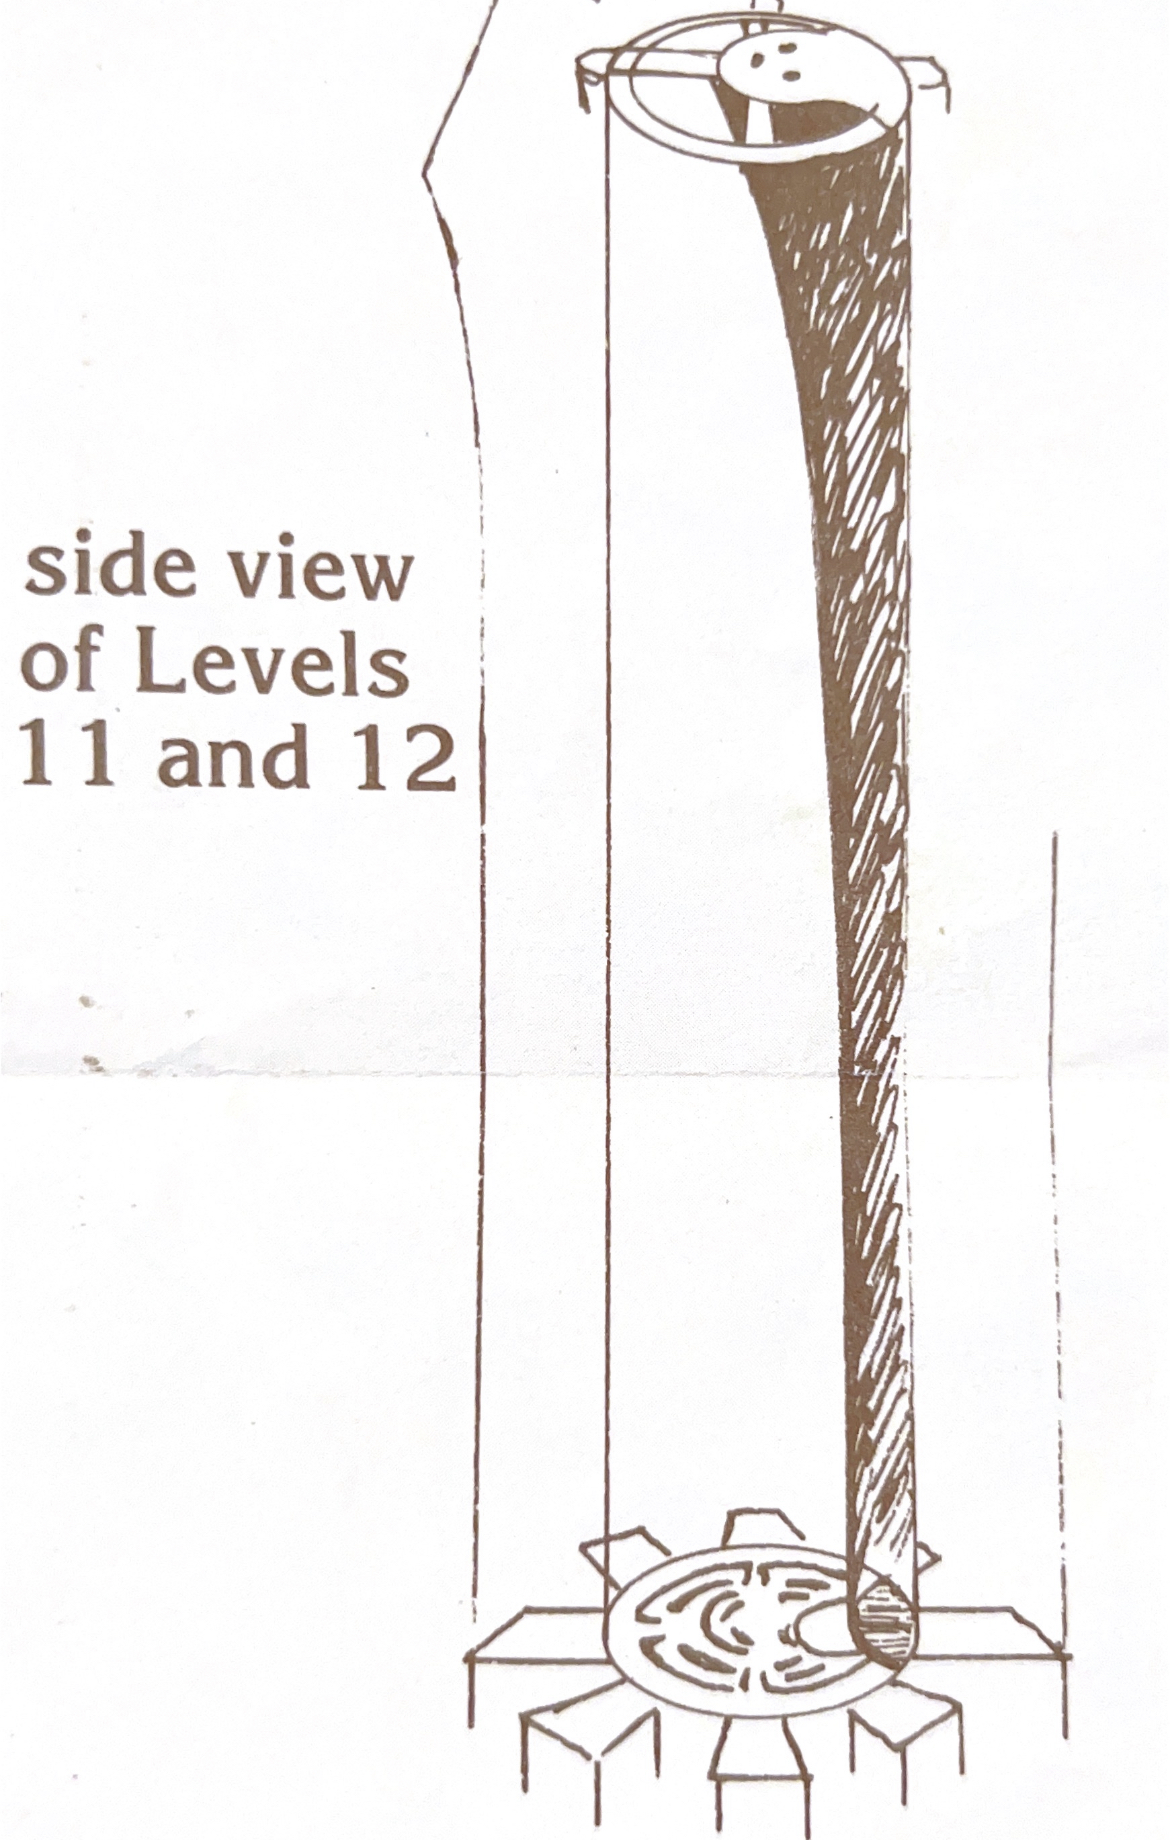
Level 11: The High Council Hall of Solamnic Knights. The Great Pillar of Yarus towered above the vast chamber with crystal windows all around, illuminating an assembly of seventy ethereal knights. They were at an impasse, trying to decide a complex case of the Oath and the Measure. One of the PCs, Sturm, though not yet a Knight, was recognized for his Solamnic ancestry and allowed to cast the deciding vote to break the impasse. In thanks, the Lord Knight gave Sturm clues to navigate the Eternal Halls to the Treasure Vault.*
Level 12: The fate of Lord High Clerist Yarus was discovered here: trapped under a pillar, 300 years ago, while playing the chess-like game of Khas. His ghost called for the return of his crown. A few rooms away, in Yarus’s private chamber, waited a vigilant dog spirit guarding a lockbox. The good boy beckoned the party to open it and within they found a minor fortune of gems and a piece of the broken Crown of Yarus. The faithful guardian then licked and scratched at a section of wall nearby, which opened to reveal a secret spiral staircase going up and down. The party went up and the dog spirit followed.
Level 13: A heavy portcullis blocked an entrance into the Eternal Halls. Unable to open it, the PCs moved on and found a lockbox containing a Potion of Polymorph Self, then continued up the stairs.
Level 14: The large central rotunda was the only way up to the next level. The guardian: twenty-tree evil spectral warriors. It’s one of the more climactic encounters in the tower but the text doesn’t really hint at that. To make it more interesting and manageable, I had them arriving in waves of d4+2 evil warriors, from all directions. When the battle was looking grim for the PCs, the spirit dog pounced in and turned the tide by securing a flank. The party prevailed after they hacked their way up the stairs and shot down at waves of pursuers. A satisfyingly epic battle. The party was low on health and spells, but continued up the stairs.

Level 15: The high paparet. From here the PCs observed the dragon army congregated 2 miles away, with an estimated strength of 2000 to 3000 men and monsters.
Level 16: The Nest. A giant owl spirit hooted when the PCs climbed up, then blinked large glowing eyes and turned its head toward a lockbox. The party opened it to find the Codex Orbum and a Ring of Invisibility. The owl took flight, soared high above, and the PCs heard its ghostly screech and telepathic voice: “The dragons are coming”
Session 3
The PCs returned and healed at the garrison stronghold and shared their findings with the Solamnic commanders. Study of the Codex Orbum commenced.
On their next mission into the tower, the PCs took the secret stairs down to the Altar of the Orb. Another lockbox was found, containing a Wand of Wonder (93 charges) and the final piece of the Crown of Yarus.
The party promptly took the completed crown up to the High Clerist’s sanctuary and placed it upon the skull of Yarus. This released his spirit from its entrapment and allowed him to fulfill his vow to aid in the coming battle.
Meanwhile, with knowledge from the Codex, Sturm activated the Dragon Orb on the Altar. We used the “Dragon Orb of Mindweb” rules from DL12 to determine Sturm’s success in activating and controlling the Orb. He was able to harness the power of the orb without getting pulled in and the sanctum’s sealed doors flung open. The final battle had begun.
We opted to use the module’s “Simplified Battle Resolution“ system to determine the results of the final assault on the castle by the dragon army. The spirit of Yarus and the activated Dragon Orb lifted the Solamnic forces to victory and turned the tide against the forces of darkness.
The End
Overall, an ambitious module with ingredients to appeal to different play styles, but it requires some work by the DM. Understanding the castle’s layout and loot can give insight into how to best use it in your game. A “megadungeon experience” is but one possibility.
*The Eternal Hall clues provided in the module is wrong, by the way. I couldn’t find a way to make the directions work. Maybe it’s intentionally wrong? Or just a typo? There are other typos in the portal numbering. A shame because the Eternal Halls seem intended to be a core part of the module. Maybe they would be fun in play. Anybody try them?
Here’s a fixed clue for navigating the Eternal Halls: From the north portcullis entrance on level 13: Right, Ahead, Left, Ahead, Right, Ahead, Right, Speak “sword, rose, crown” and enter the Treasure Vault.


[…] Continued in part 2… […]